
HARMA Attunement and Focus Explained
How HARMA attunement rolls work, what each success tier changes, and the best times to spend Focus in a run.
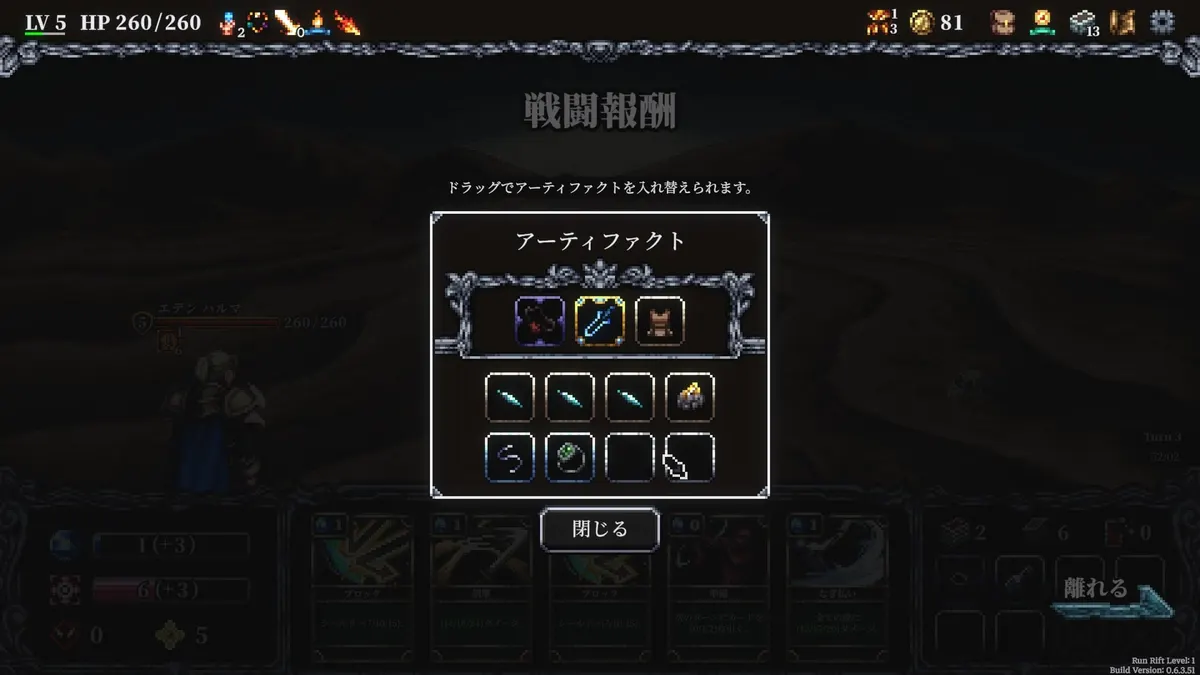
Attunement is the engine under every HARMA card. Three artifacts sit in a row, each with a visible success chance. When you play a card, the game checks them from left to right. The number of successes selects one of the card's three result tiers. Understanding the distribution, not just the headline number, is the difference between a consistent run and a pile of wasted actions. If you are new to the game, read the beginner guide→ first; this page goes deeper into the math and the decision rules. If this is your very first run, read the HARMA beginner guide→ before optimizing rates.
Why Three Rolls Beat One
A single coin flip is easy to understand but hard to build around. Three independent rolls create a curve. With three 65 percent artifacts, the chance of at least one success is high, the chance of two is decent, and the chance of all three is rare enough to feel like a bonus. You are not aiming for the maximum every turn. You are aiming for the tier that solves the current problem.
The card's brackets encode that curve. A card with 6 / 10 / 20 is a stable small hit with a lottery jackpot. A card with 12 / 14 / 16 is a consistency tool: the floor is decent and the ceiling is not much better. Those two cards ask for different artifacts and different Focus decisions. The first wants high success rates; the second can afford a low-rate utility artifact because the downside is small.
Reading the Three Tiers
| Result | What it usually means | Best use |
|---|---|---|
| One success | Low tier, often the "minimum" printed value | Finishing weak enemies, applying a status, blocking chip damage |
| Two successes | Middle tier, the practical target | Most attacks, setup cards and defensive turns |
| Three successes | Maximum tier, often a multiplier or bonus effect | Boss burst, breaking an elite, triggering artifact payoffs |
| Zero successes | Card returns to hand, action lost | Avoid by improving rates or spending Focus |
The important detail is that the three artifacts are checked from left to right. If an artifact's effect only matters when it succeeds, its slot position changes the order in which effects resolve. Some artifacts grant block on success, some improve the chance of later rolls, and some convert a success into damage. Put the effect you need to resolve first in the left slot, and the payoff you are willing to gamble on later.
What Changes the Percentages
The baseline rate is roughly 65 percent. Artifacts can raise or lower it. Broken Sword is the clearest example: it drops the rate to 55 percent but adds a large attack bonus while equipped. That trade is not automatically bad. If your deck has multiple cheap attacks, a lower rate on one slot can be worth the flat damage. If your deck depends on a single expensive finisher, the same artifact is a liability.
Focus is the other lever. One Focus forces one artifact to succeed. It does not reroll; it guarantees. That makes Focus strongest when it converts a near-miss into a breakpoint: one success into two, or two into three. Using it to rescue a zero-success turn is sometimes necessary, but it is usually a sign that your rates or your card choice were already wrong.
Unused Focus carries over. A banked Focus is worth more on a boss's dangerous turn than on a random hallway fight where you can simply take an extra turn.
The Blue Pyramid Tax
Blue Pyramid is the starting artifact that guarantees one success if every other artifact fails. It is a safety net, not a damage artifact. The cost is a slot: one of your three attunement slots is spent preventing disaster instead of adding power. That is a reasonable trade early, when your card pool is thin and a zero-success turn can snowball. Later, once your rates and deck are stable, replacing it with a real payoff artifact is often the correct upgrade.
Do not remove Blue Pyramid just because it looks boring. Remove it when you have enough consistency that the floor no longer matters, or when a specific build needs the slot more than it needs the safety.
Focus Math for Real Turns
Suppose a card deals 8 / 12 / 18 and the enemy has 12 HP. You need two successes. You have one success and two artifacts left. Spending Focus on one of them guarantees the second success and the kill. That is a clean use. If the enemy has 18 HP, one Focus only gets you to 12; you need both remaining rolls, so Focus alone does not guarantee the line. You either spend two Focus (if the game allows it on separate artifacts) or accept the risk.
The same logic applies to block. If the incoming hit is 14 and your card gives 6 / 10 / 14 block, two successes are enough only if you also have another block source. Read the enemy intent, then decide whether the extra tier is worth the resource.
Co-op Changes the Math
In four-player co-op, each player brings a deck, but attunement uses the team's artifact selection. That means your personal success rates depend on a shared loadout. Before a boss, agree on who is bringing consistency artifacts, who is bringing damage amplifiers, and who is holding Focus for the critical turn. A team that all brings greedy three-success payoff artifacts will have spectacular highs and miserable lows. A team with one Blue Pyramid or rate-booster is much easier to pilot.
FAQ
Is 65 percent the real base rate? It is the baseline shown in the current Early Access build. Artifacts modify it, and balance patches can change values, so treat the number as a current-build observation rather than a permanent constant.
Can I force all three artifacts to succeed? Focus forces one artifact per use. You cannot guarantee a perfect attunement with a single click; you need multiple Focus or a naturally lucky roll.
Does artifact order matter for damage? It matters for effect resolution and for any artifact that modifies later rolls. Put the effect you need first in the left slot and test the order in a safe fight.
Official source: HARMA on Steam ↗
Sources
- HARMA on Steam ↗
- HARMA Steam news and patch notes ↗
- HARMA Early Access roadmap on Gematsu ↗
- HARMA launch report on AUTOMATON ↗